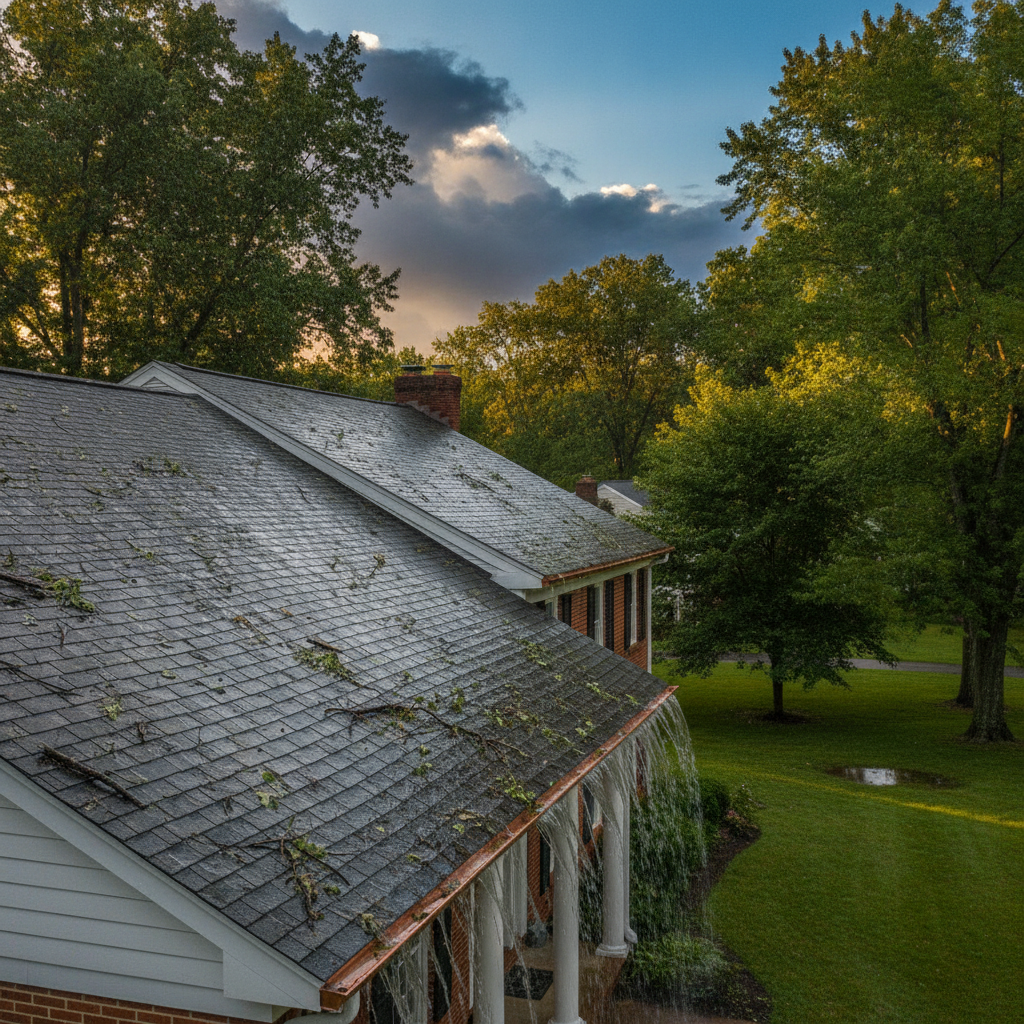
After a summer thunderstorm rolls through Westchester or Fairfield County, the immediate question is simple: did anything get damaged? The Northeast’s warm-season storms — fast-moving squall lines, afternoon convective cells, and the occasional tropical remnant — can hit with wind gusts that exceed what your roof sees during a typical winter Nor’easter. The combination of high wind, heavy rain, and hail in a compressed timeframe is exactly the scenario that exposes installation shortcuts, aged shingles, and compromised flashing. Here is how to evaluate your home systematically before calling a contractor.
Why Summer Storms Are Hard on Roofs and Siding
Summer thunderstorms in the NY/CT corridor are not the slow-moving systems you get in spring. A mature thunderstorm cell can produce localized wind gusts that lift and crease shingles, drive water horizontally under lap joints, and hurl debris that pockmarks soft-metal flashing or chips fiber-cement panels. Atlantic hurricane season (June through November) adds the possibility of tropical moisture even well inland — remnant systems regularly track through the Hudson Valley and the Connecticut River Valley, delivering multi-hour soaking rain that probes every potential entry point.
Asphalt shingles are more vulnerable in summer than in winter for one counterintuitive reason: heat. A shingle surface sitting in full sun can reach temperatures well above ambient air temperature. When a storm arrives quickly, the rapid thermal shock and the physical battering from large raindrops and hail on an already-soft surface can accelerate granule loss and micro-cracking.
The Post-Storm Inspection: Start from the Ground
You do not need to get on the roof to do an initial pass. In fact, a ground-level scan and an interior check give you the most important signals safely.
1. Walk the Perimeter — Look for Granule Discharge
Asphalt shingles shed granules over time, but a storm accelerates that process. After a significant storm, check your gutters and the ground around your downspout outlets. A notable accumulation of dark, sand-like granules — enough to fill a cup or more — suggests your shingles absorbed real impact.
Granule loss matters because the granules protect the asphalt mat from UV degradation. Once exposed, the mat degrades faster and the shingle loses its waterproofing integrity. This is a signal to schedule a professional inspection, not to panic, but it warrants attention, especially on a roof that is already approaching the back half of its service life.
2. Scan the Roof Plane from the Ground
Using binoculars if you have them, look along the roof plane from multiple angles. You are looking for:
- Missing shingles — visible deck or underlayment exposed
- Lifted or curled tab edges — even partial lifting lets water wick under on the next rain
- Creased or folded shingles — a straight crease across a shingle is a wind mark; water will eventually work through the break
- Impact marks — on hail events, look for a random stippled pattern of dark spots (bruising) across the surface; they may be subtle but consistent across the exposed areas
3. Check the Gutters and Flashing Seams
Gutters that have separated from the fascia or are holding standing water after a storm suggest the fasteners or hangers have been stressed. Gutters that overflow regularly also send water down the wall rather than away from the foundation — a setup for siding rot over time.
At ground level, look at the visible sections of step flashing (the metal at roof-to-wall junctions — at dormers, side walls, chimneys) and at the drip edge along the eave. Storm wind can lift drip-edge sections, especially if they were not adequately fastened. Per the GAF steep-slope field guide, drip edge should be nailed at intervals no greater than 12 inches; sections that have lifted will show a gap and sometimes a slight upward bow.
4. Check Siding for Wind and Water Intrusion Signs
Siding takes the full force of horizontal wind-driven rain. According to the Insurance Institute for Business & Home Safety (IBHS), wind-driven rain can enter through gaps as small as a hairline crack when wind pressure is high enough to force water upward into horizontal lap joints.
After a storm, inspect:
- Vinyl siding: look for panels that have unclipped at the bottom lock. A panel that has blown loose will flap or rattle; once open at the bottom, rain blows directly into the cavity. Also check corner posts and J-channel at windows and doors for sections that have pulled away from the wall.
- Fiber-cement siding (e.g., James Hardie): look for impact chips on exposed corners and panel faces. Fiber cement does not dent like vinyl, but a hail stone or wind-driven branch can chip the factory finish and expose raw board to moisture. Small chips on a Hardie installation should be patched promptly to prevent moisture intrusion at the face.
- Wood or engineered wood siding: check butt joints and any areas where a panel edge was already showing surface checking. Wind-driven rain exploits any break in the paint film; look for paint that has bubbled or lifted at a seam — a sign water got behind it.
5. Check the Attic and Top-Floor Ceilings
The most important interior check is also the simplest. After a storm, go into the attic — with a flashlight — and look for wet insulation, water stains on the roof sheathing, or daylight visible through the deck. Look specifically at the ridgeline, at any roof penetrations (plumbing vents, bath fans, skylights), and at the valleys. These are the highest-risk points because they involve overlapping materials and transitions.
On finished top floors, check around window frames and door frames for new staining or damp drywall. Water that enters at a flashing failure rarely comes straight down — it often travels horizontally along a rafter or along the top plate before showing up at a ceiling or wall.
High-Risk Points That Storms Expose
These are the specific spots where storm damage turns into a leak:
Valleys. An open-cut or woven valley handles concentrated water flow from two converging roof planes. Per the GAF field guide, leak barrier (ice-and-water shield) should run the full length of every valley. A storm with heavy rainfall will push water faster through a valley than any other surface — if the valley flashing was improperly installed or is worn through, the failure shows up as water at the interior valley line.
Chimney flashing. A chimney is a through-penetration that requires base flashing, counter-flashing set into the masonry, and a properly sloped cricket (a small diverter peak) on the upslope side for chimneys wider than 30 inches (per IRC §R903.2.1). The step flashing and counter-flashing rely on both sealant and mechanical fastening. High wind can pull caulked counter-flashing out of the masonry joint, especially on older homes where the mortar has already begun to deteriorate.
Roof-to-wall flashing at dormers. Dormer sidewalls see the full impact of wind-driven rain. Step flashing that was not run continuously and properly lapped behind the siding is a common failure point. After a storm, staining on a dormer’s interior side wall is almost always traced back to step flashing that has backed out or was never properly integrated.
Plumbing vent boots. The rubber collar around a plumbing vent pipe degrades faster than the surrounding shingles. Over time, the rubber cracks and lifts, and storm rain — especially driven rain that hits at an angle — can run down the inside of the boot and into the attic. These are inexpensive to replace and are a common source of slow leaks that homeowners attribute to other causes.
When to Call a Professional Inspector
A ground scan and interior check are good first steps, but they cannot replace a qualified roofer on the roof. Call a contractor when you find:
- Any missing shingles or visible deck exposure
- Interior staining or wet attic insulation after a storm
- Separated flashing at chimneys, dormers, or valleys
- A roof that is older and showing cumulative wear — storm damage on an aging roof often warrants replacement rather than patching
If you suspect hail impact, the surface bruising can be subtle. A trained eye can identify the difference between a random granule loss pattern from normal weathering and the uniform stippled pattern of hail strikes across a roof plane.
Document everything before making repairs. Photograph the damage from the ground and, if you can do so safely, at close range. Your homeowner’s insurance policy typically requires evidence of storm damage; a dated photo set before repairs protects your claim.
What Gunner Roofing Checks on Every Post-Storm Assessment
When Gunner Roofing performs a post-storm inspection, the scope covers all the points above plus a detailed look at the underlayment wherever shingles are lifted or missing — because the shingles are the first line of defense, but the underlayment is what keeps water out until repairs are made. Every roof replacement Gunner performs includes ice-and-water shield installed to meet or exceed code minimums, leak barrier run through all valleys, step and counter-flashing at all penetrations (dormers, chimneys, skylights, wall terminations), and proper attic ventilation — because these are the exact points that summer storms probe.
Gunner is a GAF Master Elite® 3-Star President’s Club contractor — a designation held by fewer than 3% of roofing contractors nationally (per GAF’s Master Elite program). Gunner is also fully licensed, insured, and bonded in New York, Connecticut, and New Jersey, and handles the building permit on every project.
FAQ
Q: How soon after a storm should I check my roof?
A: Check within 24–48 hours while the weather system has cleared and you can observe the damage before the next rain event complicates the picture. Interior checks (attic, ceilings) are safe immediately; roof-surface inspection from the ground can follow once conditions are dry enough for stable footing.
Q: Does my homeowner’s insurance cover storm damage to a roof?
A: Most standard HO-3 homeowner’s policies cover sudden and accidental damage from wind and hail. Coverage varies by policy, deductible structure, and the age/condition of the roof at the time of loss. Document damage with dated photographs before starting repairs and contact your insurer promptly — many policies have a notification window after which claims can be contested.
Q: Can I walk on my roof to inspect it after a storm?
A: Most homeowners should not. A wet or debris-covered roof is slippery, and the risk of injury is high. Ground-level observation with binoculars, plus an attic check from inside, gives you the key signals safely. Leave roof-surface inspection to a qualified contractor.
Q: What is the difference between wind damage and hail damage on shingles?
A: Wind damage typically shows as lifted tab edges, creased shingles, or missing shingles — it tends to track with wind direction. Hail damage shows as a random, stippled pattern of impact marks (bruising) distributed across the exposed roof plane, often with corresponding dents in soft-metal components like aluminum gutters, flashing, or HVAC equipment. Both can be present after a severe thunderstorm.
Q: My siding looks fine but I have water intrusion near a window — could storm damage be the cause?
A: Yes. Wind-driven rain at high pressure can infiltrate at window flashing and J-channel intersections even when the siding panels look undamaged. The entry point is usually at the gap between the window frame and the siding trim — either where caulk has failed or where flashing was not properly integrated behind the trim. A contractor should examine the flashing detail, not just the visible siding surface.
Q: How long do repairs typically take after storm damage?
A: Minor repairs — replacing a few shingles, reseating flashing — can often be completed in a single visit. If the inspection reveals that a larger section of the roof needs replacement, scheduling, material lead times, and permit requirements will affect the timeline. In storm-active periods, contractor schedules in the NY/CT area can run several weeks out; get on the calendar promptly.
Get a fast, free quote
No inspection visit needed - we measure your roof from satellite imagery and send your quote.